Updated September 22nd, 2024 to use the new TimeDataSource in the examples, not a TimelineView. Props to friend of the blog Jason Gregori for pointing this out
Apple has provided some new format style implementations with Xcode 16 (which is in beta as of this writing).
I’ve been working to update the Gosh Darned Site to include all of the new updates, but ran into a wall when it comes to two of the new SwiftUI-only styles: SystemFormatStyle.Stopwatch and SystemFormatStyle.Timer. Initially, I expected to get an animating SwiftUI view “for free” without needing to create any sort of a view hierarchy but quickly found out I was wrong.
Trying to figure out they’re to be used was frustrating. Apple’s documentation is pretty sparse, as is the code comment documentation in SwiftUICore.
Because these new styles aren’t a part of Foundation, you can’t see their internals at the Swift Foundation Github repo. It’s unclear exactly how to use these new styles to make a stopwatch or a timer in your views.
I did figure it out, and decided that sending some information out into the æther might help out any other devs who’re looking to use these styles.
A FormatStyle Refresher
In brief, format styles are Apple’s modern Swift replacements for the older Objective-C Formatter classes. They allow you to quickly and easily create localized string representations of various data types to display to a user without all of the “gotchas” relating to the old classes.
They’re safe, performant, and really easy to use throughout your code to convert one type into another. Apple provides quite a few implementations for all sorts of data types from dates, numbers, lists, to measurements.
I’ve covered them extensively in the past, as well as created an entire site which fills in the gaps in Apple’s documentation.
The big issue is that until very recently Apple’s documentation has been extremely sparse, making these powerful tools hard to use.
SystemFormatStyle Differences from FormatStyle
All of the new styles included in the SystemFormatStyle enum/namespace are all made to format Date objects. However unlike the FormatStyle implementations inside of Foundation which have their outputs set to be String values, these new styles will output an AttributedString by default.
The only SwiftUI View that accepts an AttributedString is the Text View, and that’s only because Apple added a new initializer which accepts it. This really isn’t as limiting as it might seem at first, really the only places you’re going to be using these new styles are in a Text view anyway.
One last big difference that’s only present in the new SystemFormatStyle.Stopwatch and SystemFormatStyle.Timer styles is that a second data value is passed into the styles in order to correctly calculate date offsets. All other Foundation format styles will accept different enum types which control the output of style. These are the first ones which take in an additional value or object in order to work.
Enough preamble, let’s build a stopwatch.
Stopwatch MVP
The MVP for a stopwatch that counts up needs two pieces of data to function, and two pieces of UI:
- Data
- A
Datewhich represents starting time - A
Datewhich represents the current moment in time to calculate an offset to the starting time
- A
- UI
- A
Textview to show the styled differences between those dates - A
Buttonwhich starts the stopwatch counting up
- A
Lets build that out:
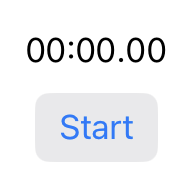
struct Stopwatch: View {
    @State var startDate: Date? // 1.1

    var body: some View {
        Text(Date.now, format: .stopwatch(startingAt: startDate ?? .now)) // 2.1
        Button("Start") { // 2.2
            startDate = .now
        }
    }
}
This gives us the base view hierarchy that we’ll need to make our stopwatch. It’s nonfunctional right now, since our start and end dates are Date.now and there’s no mechanism to animate the view.
It’s 2.1 where our new SystemFormatStyle.Stopwatch style is being used. We’re using the new initializer on the Text view which takes in a type as well as a format style which has it’s output set to an AttributedString. The .stopwatch(startingAt:) static method we’re using here is an Apple-provided extension on FormatStyle that we use as a shortcut to creating a new instance of the required SystemFormatStyle.Stopwatch format style.
Adding Animation Using The New TimeDataSource
If you read an earlier version of this post used a TimelineView to handle the animation. Little did I know that there is an even easier way: A new struct called TimeDataSource.
A TimeDataStruct is a special new type provided when importing SwiftUI. It’s purpose-built to give a Text view a live-updating values which will allow for animations without any sort of Timeline view or other @State property.
Using this new type has a small amount of complexity though, the new struct has no public-facing initializers and you’re reliant on the type properties and methods available. For us, the purpose-built property that we’ll use is TimeDataStruct<Date>.currentDate.
You’ll notice that TimeDataStruct has an associated type (the <Date> portion of the code). This is because each of the different properties and methods can provide you with a different value type, from Duration to Range<Date>.
Let’s add that, and also let’s add a reset button and a few view modifiers to make things look nice.
struct Stopwatch: View {
    @State var startDate: Date? // Stores when the user presses the start button
    @State var isAnimationPaused = true // Flag to control the animation update schedule
    @State var lastUpdate: Date? // Stores the date of the last update on screen

    var body: some View {
        switch isAnimationPaused {
        case true:
            // By using a static `Date` value, the view will be static
            // Using the `startDate` or Date.now fallback allows the stopwatch to pause and
            // continue to display the duration
            Text(Date.now, format: .stopwatch(startingAt: startDate ?? .now))
        case false:
            // Using a `TimeDataSource`, the view will animate
            Text(TimeDataSource<Date>.currentDate, format: .stopwatch(startingAt: startDate ?? .now))
        }
        HStack {
            Button("Start") {
                // Store the moment at which the user presses the Start button
                startDate = .now
                // Unpause the TimelineView's animation schedule
                isAnimationPaused = false
            }
            .buttonStyle(.bordered)
            .tint(.green)
            .disabled(isAnimationPaused == false)
            Button("Stop") {
                // We only pause the animation schedule to stop the
                isAnimationPaused = true
            }
            .buttonStyle(.borderedProminent)
            .tint(.red)
            .disabled(isAnimationPaused)
        }
    }
}
We now have a a fully functioning stopwatch.
Let’s Build A Timer Using SystemFormatStyle.Timer
Conceptually, SystemFormatStyle.Timer is similar to SystemFormatStyle.Stopwatch. The Date object that we apply the format to is the “current” date used for the style’s calculation, but instead of a single Date representing the starting time of the stopwatch, we pass a Range<Date> value representing the upper and lower bounds of the timer.
If you’re a visual learner (like myself), this might help:
   0:00                                                              0:10
LowerBound                                                        UpperBound <- Range<Date>
    └----------------------------------------------------------------- ┘
                                  <-|
                                   0:05
                                currentDate
- If the current date is at or below the lower bound, it will display
0:00 - If it’s within the range, it will calculate and display the offset between the current date and the lower bound
- If the current date is at or above the upper bound, it will display the offset between the lower and upper bound
Timer Code Example
The base structure of the view hierarchy is really similar to the stopwatch. We have a Text view with a TimeDataSource to handle the animation, a Stepper to add time to the timer, and some buttons to stop or reset it, and a few @State properties to handle user interaction.
struct CountdownTimer: View {
    private let timerStepRange = 0 ... 60

    @State var isAnimationPaused = true // Flag to control the animation update schedule
    @State var timerRange: Range<Date>? // Stores the range of the timer
    @State var timerStep = 0 // Bound to the stepper to control the timer

    var body: some View {
        timerDisplay
            .font(.title)
        stepperControls
        buttons
    }

    var timerDisplay: some View {
        if isAnimationPaused {
            Text(.now, format: .timer(countingDownIn: timerRange ?? .now ..< .now))
        } else {
            Text(TimeDataSource<Date>.currentDate, format: .timer(countingDownIn: timerRange ?? .now ..< .now))
        }
    }

    var stepperControls: some View {
        // A simple stepper that adds seconds to the timer in increments of 10
        Stepper(value: $timerStep, in: timerStepRange, step: 10) {
            Text("Seconds")
                .padding()
        } onEditingChanged: { didPressDown in
            // Verify that the user has released the button
            guard didPressDown == false else { return }
            timerRange = makeTimerRange(addingSeconds: TimeInterval(timerStep))
        }
    }

    var buttons: some View {
        HStack {
            Button("Start") {
                // Recalculate the timer's range based on the current step on the Stepper vie
                timerRange = makeTimerRange(addingSeconds: TimeInterval(timerStep))
                // Toggle the animation
                isAnimationPaused.toggle()
            }
            // Disable the button if the timer is running OR if the stepper value is '0"
            .disabled(isAnimationPaused == false || timerStep == 0)
            .tint(.green)
            Button("Stop") {
                isAnimationPaused.toggle()
            }
            // Disable the button if the animation is paused
            .disabled(isAnimationPaused)
            .tint(.red)
        }
        .buttonStyle(.bordered)
    }

    /// Returns a `Range<Date>` that can be used by timer's format style
    /// - Parameter seconds: `TimeInterval`
    /// - Returns: `Range<Date>` where the lower bound is the current date and the upper bound is the
    /// current date adding the `seconds` parameter
    func makeTimerRange(addingSeconds seconds: TimeInterval) -> Range<Date> {
        // We capture the current date to be used throughout this method to guarantee accuracy
        let currentDateTime = Date.now

        // Make sure that our seconds value is greater than zero. This guarantees that our range calculations will
        // be formatted correctly.
        guard seconds > 0 else {
            // Otherwise we return a 0 value
            return currentDateTime ..< currentDateTime
        }
        // Date calculations should _always_ be done using the `Calendar` APIs to avoid any sort of strange date
        // related edge cases.
        let upperBoundDate = Calendar.current.date(byAdding: .second, value: Int(seconds), to: .now)
        // As a fallback, we use the less-safe (but probably okay) Date API.
        return currentDateTime ..< (upperBoundDate ?? currentDateTime.addingTimeInterval(seconds))
    }
}
Running this code, you’ll end up with a very simple countdown timer:
Just The Beginning
These new styles are two of a handful that are being released with Xcode 16 under the SystemFormatStyle enum/namespace and examples only scratch the surface of what these new format styles can do. Unfortunately I wish I could say to “read the docs”, but the sad truth is that Apple has once again woefully fallen short in sharing documentation with their developers.
Thankfully in the comings weeks, there will be updates to the Gosh Darn Format Style that documents everything (and more!).